How to Build a Successful Educational App

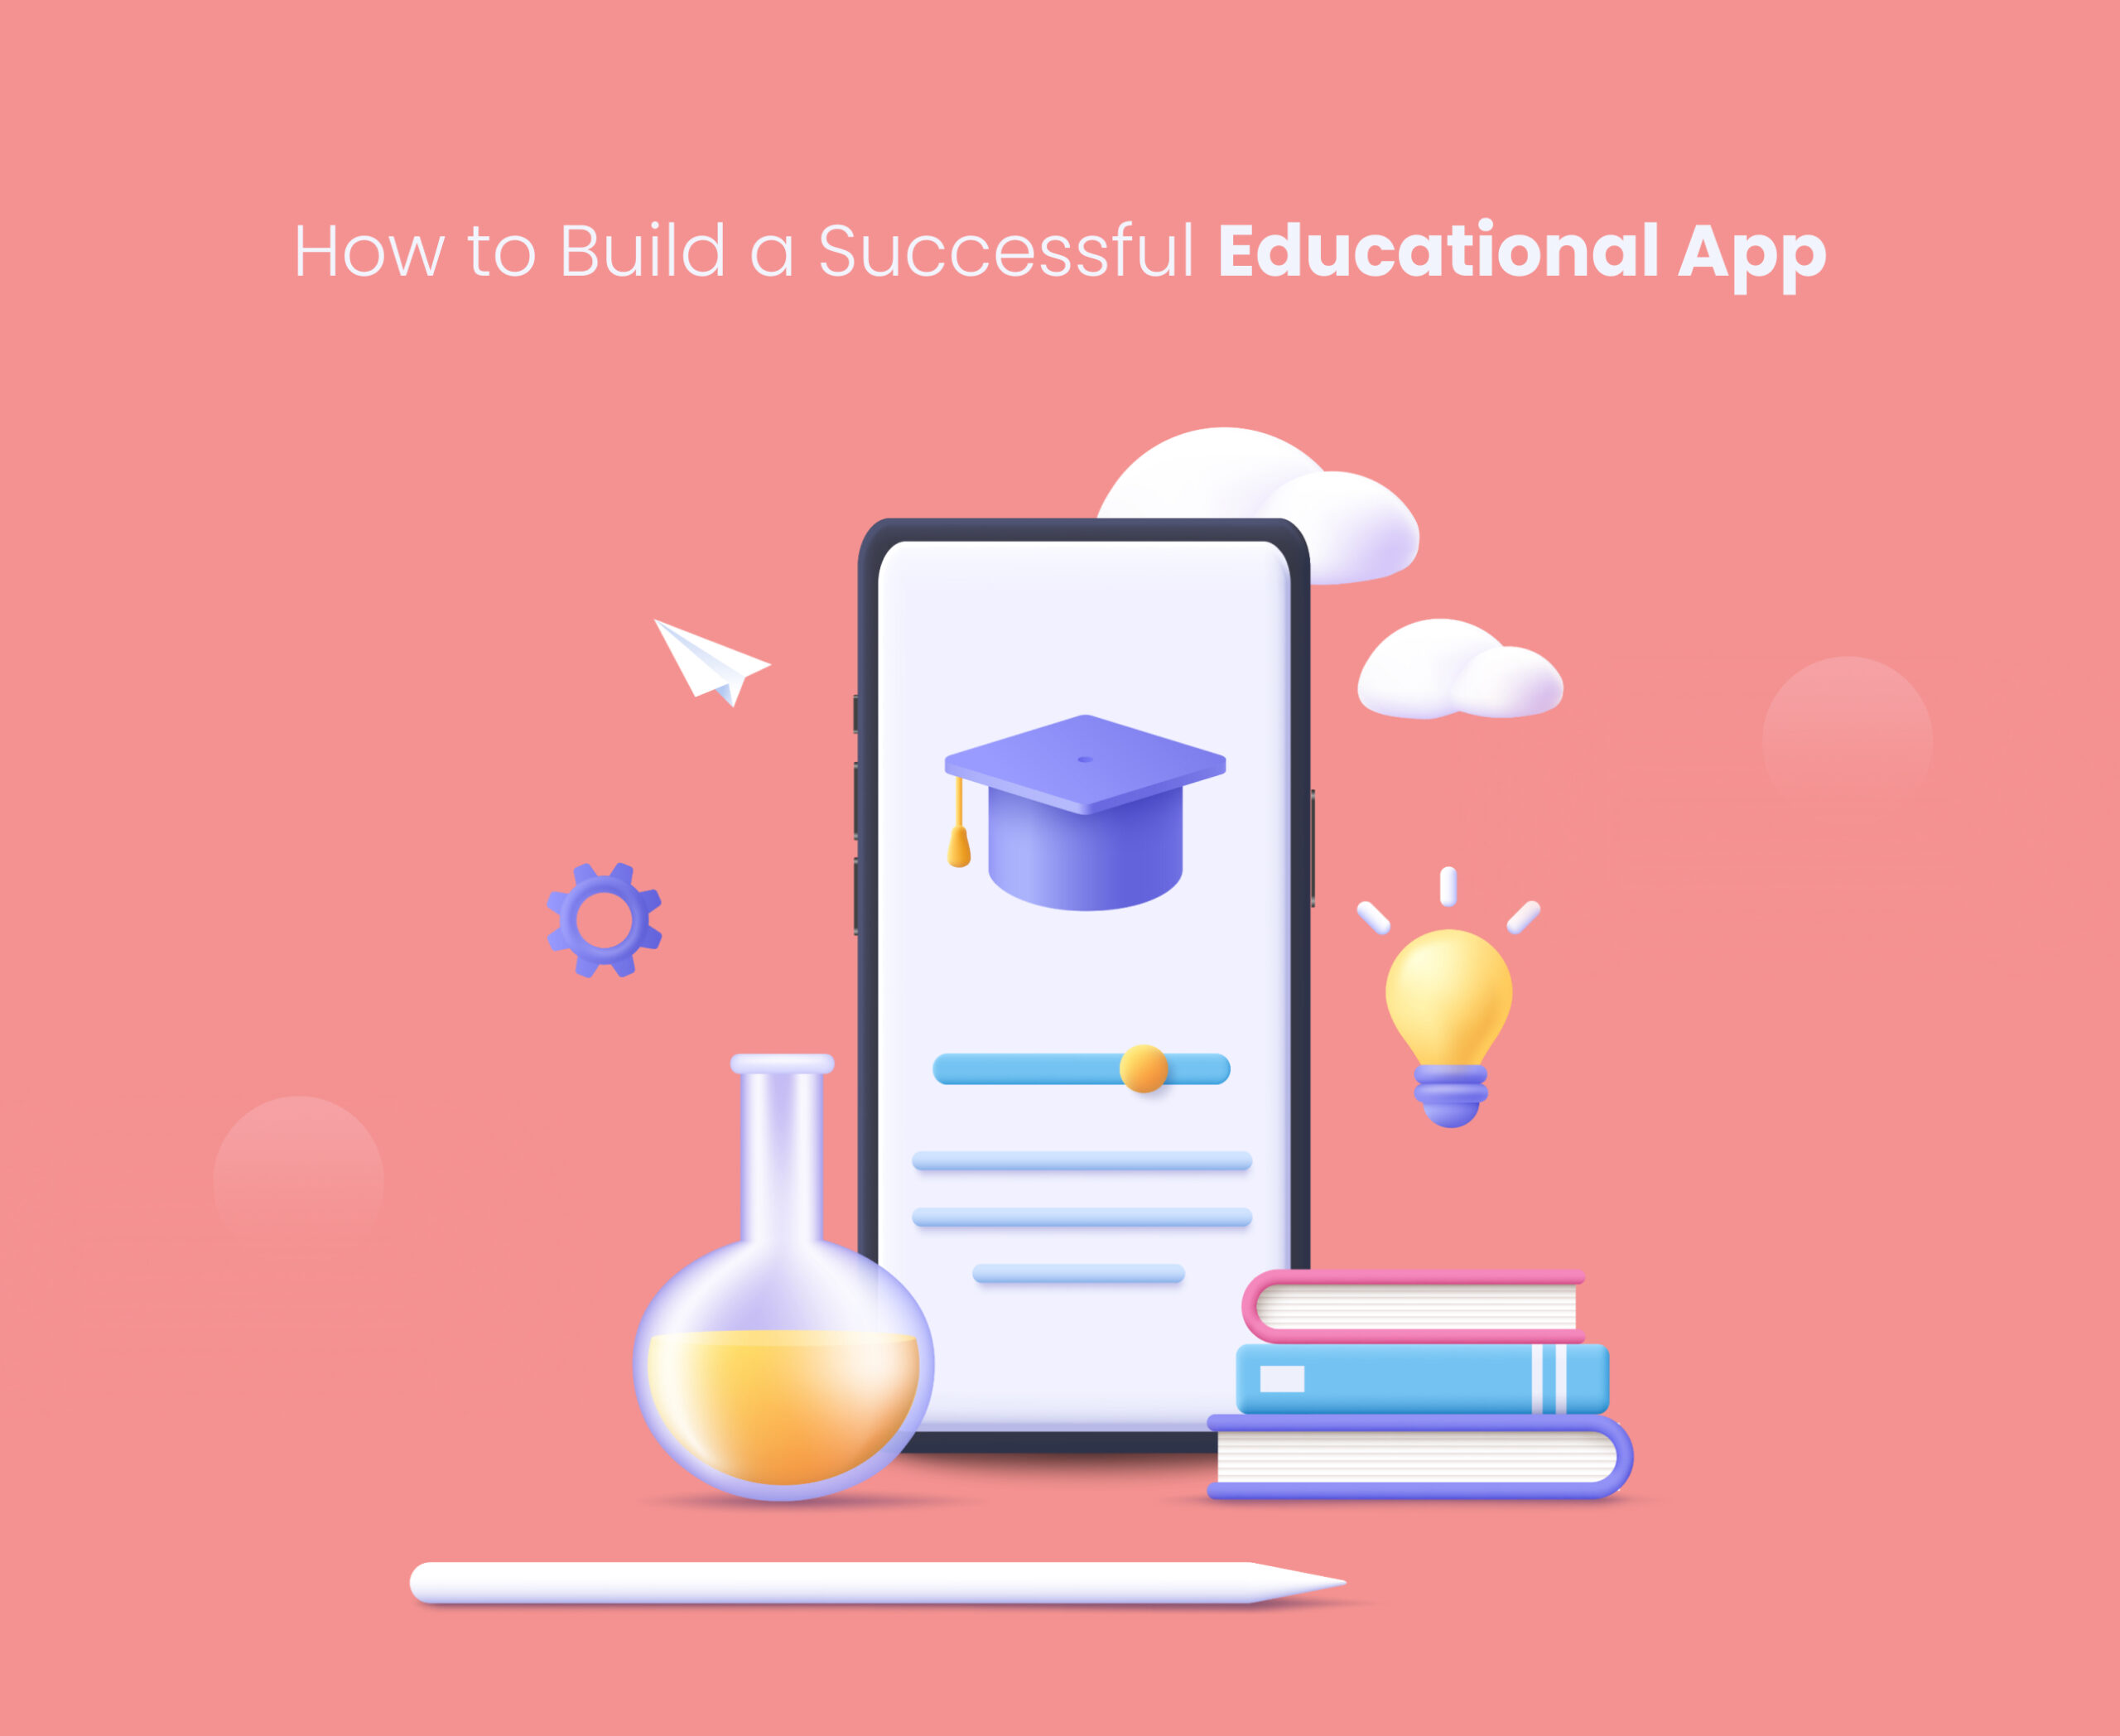
In today’s world, everything is just a click away, be it shopping, eating, or entertaining. Learning has also become convenient, more accessible, and friendlier, especially during and after the pandemic. It’s no surprise, then, that startups and existing companies alike are frantically developing learning apps in an attempt to automate and revolutionize education. If you are one of those individuals who want to create educational apps and monetize from them, this is a thorough guide to help you get started.

Education is on the rise. Not to obtain degrees but to acquire insights. Nowadays, people value and rely more on foundational knowledge than grades. The purpose of mobile educational apps is simply to facilitate learning. The smartphone or tablet is the most convenient tool for learning different languages, how to drive, how to code, studying fine arts, or keep up with your schoolwork on the go. Even schools and universities use educational apps today to aid instructors. You can find awash apps catering to different target audiences, such as teachers or students. Thus, before venturing into eLearning app development, you should assess market potential. And if you want to make a difference with your idea, you must consult a noteworthy mobile app development company. This will enable you to have a finish of the latest technology and interactive user experience in your app.

successful educational app
  • According to Statista, the global e-learning market is expected to reach 243 billion dollars by 2022. 
  • As of the second quarter of 2022, Mobile education apps were the second most popular choice, with a 10.44 percent share in the Google play store.
  • Over 9.5 percent of iOS apps are educational, making them the third most popular category in the Apple app store.
  • E-learning is being used extensively and regularly by more than 40% of Fortune 500 companies.

Types of educational apps and their users

In the beginning, educational solutions may aim to:

Teachers and student’s parents or guardians

You might also consider other possible clients, such as the administration of schools or marketing firms (interested in placing ads on your education platform). It’s crucial to keep in mind that managing the provision of your digital products will likely require an additional layer.

There are other subcategories, such as:

  • Systems for managing education (aka LMS- Learning Management System)
  • ERP solutions for education that manage classrooms
  • When analyzing the best learning applications, we’ll focus on the most noteworthy categories.
  • All you really need to know about the various educational app categories is who your product will be intended for and how you plan to aid this target market in effectively achieving their educational objectives.

Benefits of Educational app

Productivity

By using different educational apps, teachers and students can increase their productivity. Performing their regular tasks with advanced tools not only saves time but also aids in accuracy.

Easily accessible

Since the internet is now everywhere, users can access the app anywhere and anytime. This means that even if there is an occurrence of unforeseen events, students and teachers can convey queries and resolve them without hassle.

Analysis

Yes, this is probably the biggest advantage of every app out there, and the major reason we tend to use it. The educational app can provide the analysis of users’ performance and achievements with the time taken to reach their respective goals.

Saving

As teachers don’t have to do each and every task manually, it saves them a lot of time and money. And especially during the pandemic period, when students and teachers can communicate and resolve the issues in real-time.

Essential features to include in educational app development

Even if every education app is different, they nonetheless share a common set of fundamental features. We’ll discuss the fundamental components of an educative app below. Depending on the consumer group, we split them into two categories: both students and teachers.

For students

1. Sign-up and log in

With the help of these capabilities, each user may be properly identified in your app, enabling users to create profiles and monitor their progress. Your sign-up procedure should ideally only require a single step and require social media or email accounts.

2. Student’s profile

Basic user information and a profile picture should be included in a learner’s personal account. Users should be able to view individualized information and app-specific metrics like the number of courses they have purchased and signed up for, billing information, etc. On their profile page.

3. Search boxes and filtering options

With the help of a search bar, students can navigate the app easily and discover necessary academic materials. Amongst the most used search methods on digital learning apps are keyword searching and browsing categories. To provide students with appropriate courses and content, you could also integrate a recommender system.

4. Online Payment Portal

You must incorporate a payment mechanism if your educational app relies on paid memberships or offers premium courses. Integrations with payment gateways like PayPal make transactions simple and quick.

To speed up the payment process, the majority of mobile apps also establish Google Pay and Apple Pay interfaces. Your possibilities for making payments are also further expanded by wallets, credit cards, and other tools. Irrespective of the method, account information and passwords must be securely maintained within the app.

5. Learning metrics

By utilizing comprehensive dashboards, learning applications can help to indicate the pace and grasp of learning. To do so, it can list ongoing and finished lessons, awards, certifications, achievements, and targets.

6. Precise academic materials

Educational contents are generally categorized by relevance, topic, and other factors in EdTech apps. Courses that cover theory, multimedia activities, audio and visual lessons, live streaming lectures, and exams might be included.

7. Cross-platform support and Cloud inclusion

You must ensure that both learners and teachers have a smooth user experience because both groups frequently utilize multiple gadgets for educational reasons. For users to be able to access the app from any device or platform, all progress should be stored and synchronized via the cloud. 

For tutors and teachers

1. Sign-up and Log in

Teachers must have the same access to their profiles as students in order for them to enroll in the system. In addition to profile information, an app profile should include a full dashboard with current tasks, their students, and other pertinent information.

2. Admin Console

This function informs teachers of their student’s academic obligations, projects, assignments, co-curricular activities, etc. Additionally, it needs to monitor students’ performance, scores, and presence.

3. Notification

Completion of assignments, assessments, and registered students can all be provided to teachers via notifications.

4. Test generation methods

The ability to create online tests for students should also be available to teachers. As a result, a test maker that can be customized is indispensable for tutors and teachers. It would be ideal if educators could offer tests online, keep track of the results, and grade them automatically.

Steps to follow App development

If you have no prior experience developing apps, the following stages apply to all projects independent of the sort of mobile application you’re developing:

  • Exploration and finalizing idea 
  • Designing prototypes 
  • Full-fledged Development 
  • Deployment

While each step is packed with several tasks in general, the same across projects, there are certain quirks when it comes to developing online learning apps. Let’s go over the main processes for creating an educational app. 

Finalizing an idea

Create a distinctive (to some extent) idea by considering what your clients prefer to see on their phones, as well as current trends and business potential.

In our view, every promising idea includes a discovery phase, and developing mobile learning apps is certainly no different.

Discovering your clients and their demands is what research is all about.

You will select a platform based on the audience your mobile solution is intended for and the purpose for which it is intended. 

Designing a prototype

It’s time to give your idea a form once you’ve decided who you’re doing it for. You achieve this by creating an interactive prototype that resembles a genuine app and developing the UX/UI.

The plan is to test this prototype on the intended audience and make adjustments based on what is learned. Consequently, you will approach the following stage well-prepared and with a refined prototype that has to be converted into code.

What are some challenges at this first stage of creating an educational app?

  • Keep in mind that kids like to tinker with things, so when you design user tests to evaluate the viability of the UX, ask for one thing and observe how they carry out the other task that is most important to you.
  • Use the best picture and video formats, caching, and other related techniques to account for some educational institutions’ slower internet speeds.
  • The UI should be used by a very diverse range of people.
  • Test all user roles, such as those of the student, instructor, parent, etc.

Development

It’s practically a cliché that programmers code and quality engineers test during the development phase. Of course, there’s more to that, but unless you need to personally manage developers, you don’t really need to know. 

You’ll require a development team made up of the following professionals to create an education app for iOS or Android:

  • Project Manager
  • UX/UI designer
  • one or two mobile app developers
  • One or two back-end developers (based on requirements)
  • QA specialist.

You have two primary choices since you require the assistance of multiple people: recruit an internal team or use an outsourced company’s services.

Both of these strategies have positives and negatives. Internal teams facilitate better communication. However, because of the better living standards in some regions of the world, they frequently cost more. While maintaining the same level of skill and without sacrificing the quality of the final product, developers from outsourcing locations offer more competitive pricing and they can help you to shape up your idea.

Deployment

Although publishing the software to the App Store and Google Play may appear to be the last step in making it accessible to the general public, there are still a few considerations:

Avoid skipping the server component’s stress test

When a large number of people begin actively using your educational application, you want to know how it will perform.

Configure DevOps correctly

DevOps methods should have been established throughout the development phase but keeping them up after release guarantees that you can deliver updates without any issues once your app is available for download.

Evolving technical developments are changing online learning trends in 2022. Thus, as businesses compete for customers, education apps are becoming more avant-garde. We selected a group of technologies that have an effect on the present digital learning landscape.

Live Streaming

Real-time communication between viewers and streamers is one of the main market factors for video streaming. As an outcome, learning is becoming more and more interesting and customized.

Augmented and Virtual reality (AR/VR)

By analyzing readable content and presenting instructional materials visually, augmented reality (AR) facilitates holistic education. Regarding VR, it enhances visualization and encourages learners to have engaging experiences.

Artificial Intelligence

In educational apps, AI algorithms can automate note-taking and grading, produce personalized suggestions, and provide chatbot assistance.

Micro training

This training method presents information in manageable, bite-sized learning pieces so that consumers can more easily understand new ideas. Since smaller packages are simpler to master, micro training makes the material more palatable and interesting.

Gamification

In terms of in-app education, stages, incentives, and performance bars increase drive and motivate app users to advance more quickly. Additionally, using a scoreboard, intros, and other gamification tools can foster a productive atmosphere that motivates users to keep learning.

Successful examples

We recommend starting with a review of your rivals before teaching you how to make an educational app. It is vital to be aware of your major rivals if you plan to create a custom mobile app for educational purposes.

A brief overview of all the popular mobile learning tools so you are familiar with their conceptual frameworks.

  • Language study apps Babbel and Duolingo.
  • Users can utilize Mathway and Photomath to solve math problems with explanations.
  • One of the most well-liked children’s apps, ABCmouse, includes reading, math, painting, and music.
  • Teachers and students can collaborate online in a classroom setting using Google Classroom.
  • Picture This Program recognizes a plant in a picture, instructs the user on how to take care of it, records watering, etc.
  • A digital library for kids called Epic.
  • Create and take quizzes using Kahoot.
  • Socratic — ponder Google search for academics on AI-boosted, learner-friendly.

How much does it cost to develop an educational app

One of the most ambiguous issues in application development is the cost. The amount will be determined by a few factors because there is no conclusive solution. Your development expenses for an educational app will be determined by:

Vital features, UX/UI design, operational costs (Third-party APIs), analytics and motion graphics,  and much more. 

The investment required for the app increases with its level of sophistication.

We always advise creating an MVP first to assist reduce costs. The MVP aids app owners in reducing development costs while gaining a deeper comprehension of pertinent features and user requirements.

How to monetize your idea

There are quite a few ways and models to incorporate to gain a revenue stream from your eLearning app.

Let us go through several ways to monetize educational apps for you.

Freemium

Freemium is the revenue strategy that eLearning apps employ the most frequently; you provide your customers access to a condensed version and encourage them to upgrade to the full version if they enjoy it. A freemium business model attracts more customers and yields substantial profits. In this case, the app has a rudimentary or constrained set of functions and offers full capability in exchange for a premium fee.  Although it might be a one-time payment, most educational apps currently require a subscription.

The free version ought to be completely functioning.

For instance, the free edition of the Luigi language-learning app contains all of the same courses as the commercial version, but you won’t have access to the grammar bot and automatic speech testing until you pay the membership price. Although not all learners urgently require these features, especially if they utilize the app as a supplement rather than their primary source of materials, they nonetheless make for useful practice tools.

Subscription with a free trial

Another popular monetization strategy used by producers of educational apps is to provide a free trial.   With a free trial, you provide users with immediate access to all app features for a brief period before asking them to subscribe by paying. Usually, two weeks are sufficient to become familiar with an app yet not become bored of it.

Adverts

All industries can benefit from the business model of in-app advertising. It enables app creators to monetize their apps by displaying advertising. This revenue stream provides many ad forms, including banner ads, incentive ads, and more, to capitalize on the user base. In digital learning, ads as a monetization strategy should be utilized with moderation. Ads that interrupt lessons cause the user to lose focus, which is a major disadvantage.

Paid Download

The paid download monetization approach is the final one. Users pay a one-time price with this model to download your application and benefit from all of its features. For providers of educational services who already have a clientele, this is a viable option. Employing educational app developers will enable schools, universities, and providers of all kinds of courses to reach a wider audience and improve the learning experience of their students.

Bringing it All Together

Education-related apps have multiplied since knowledge is now more accessible than ever. The educational process is augmented by online courses, language-learning apps, and other online learning options, making it more interactive and individualized. Apps for mobile learning are more accessible and create a structured learning process in a distance learning setting. 

The time is here if you have been waiting for the ideal moment to enter the market. Get in touch with us, and we’ll assist you in developing a strong eLearning application.

Benefits of Mobile App Animation for User Experience

“Good Design is Obvious, Great Design is Transparent”

-Joe Sparano

You have probably heard this saying and may have found it quite vague. But on the contrary, it has a powerful meaning. Clients today want simple, direct, and user-friendly goods and services. And obviously, it needs to be aesthetically pleasing. The same focus is applied when creating an intuitive mobile app user experience.

When users find animation, it fosters a sense of well-being in human-centered design, where the user is the primary priority. These animations give an app dynamism and liveliness along with users’ emotional responses. As a designer, understanding how invisible animations are is just as crucial as developing animations themselves. Because you need to make something that is both human-like and functional.

Table of Contents

Mobile App Animation: What is it?

The significant components of your UI/UX design approach for mobile apps are animations, which give fluid screen transitioning, increase friendliness, guide users through the app with convenience, and do a lot more. With the help of a top-notch UI UX design agency, your end-users can interact with your application more effectively by incorporating suitable animations adequately.

Why Must You Include Animations in the Interface?

It takes more than eye-catching effects and a simple user interface to beat off your rivals, especially if they have been in business for a long time and have amassed a sizable customer base. Even a well-designed interface could appear confusing to certain people without animation, making them feel as though they are performing actions outside of any kind of context. 

The look and feel of an app are improved with animations. The user experience is made more palpable and more immersive by connecting animations to audio and sensory responses, which is a typical method that lowers the cognitive load. The brain retains all connections inside an application faster and takes less time to acquire background information when a user receives “feedback” from the app immediately following a specific action.

Because customers don’t know the product and do not see it the same way that its creators do, context and user guidance are essential for any mobile app. Even if the screens are not connected, animations might divert users’ attention from one to the other. No user will ever feel lost when accessing your application this way.

A well-designed and user-friendly login page with clear guidance and intuitive animations can ensure that customers feel comfortable and confident accessing your app, even if they are not familiar with the product.

Types of Animations 

The contemporary user interface uses two types of animation:

  1. Functional
  2. Delightful

Functional animation is a kind of understated animation that we use in UI designs. The purpose of functional animation is to make it easier for the user to comprehend what is happening and how to use your app efficiently.

User emotional responses are the main focus of delightful animation. This kind of animation aims to amuse the viewer while incorporating a brand’s ideals into a product.

Functional Animation

Users can enjoy a functional animation that explains how the software functions. It tells the brand story along with the app’s usability and creates a user journey. It is expected to:

  • Create logical transitions
  • furnish visual proof
  • Display system status 
  • Assist the user in the beginning

Delightful Animation

We are hearing and using the term “delight” more frequently to describe enjoyable experiences in our products. The allure of delight is what makes us fawn over a product. Its fundamental goal is to pursue this while creating an app. Additionally, animation can contribute to a genuinely enjoyable and memorable user experience.

It is expected to:

  • Demonstrate Polish
  • Reward the User
  • Bring personality and humanity to the app.
  • Entertain users

Benefits of Mobile App Animations

An exclusive interface

Creating animations that are tailored to your product can help you provide a seamless experience to your customers. It assists in matching user interests, preferences, and choices while also delivering maximum desired outcomes with minimal effort.

Reduces cognitive load

In UX design, cognitive load refers to the mental preparation power required to use a product. When the amount of data that can be collected outpaces the user’s capacity to tackle it, the overall user-friendliness of the product deteriorates, which we call cognitive overload.

By focusing the user’s attention on essential information, animation can reduce cognitive load. The use of text highlights can help highlight relevant details in a text copy. A guide can motivate people to take a step forward, show how to navigate an app, inform them when an action has been completed, and many other things. To unlock all the features of an app, you can use animated texts, navigation micro-interactions, and animated heroes.

Enhanced screen space

Messages or promotions can be displayed more efficiently by moving banners within an app. This allows you to conveniently display all of your promotions and offers in a small amount of space. Moreover, by adding multiple options under one single menu or list you offer the sense of freedom to choose what users want along with the reduction in screen space.

Convenience

One of the primary advantages of implementing animations into your app is that your application will be more convenient and usable. Users can more seamlessly perceive the formatting and engage with it. They also receive accurate feedback about their app actions.

Things to consider when implementing animations

  1. Create a mobile UI animation that solves the problems of your target audience.
  2. Every element of your animated graphics should have a purpose.
  3. Create an animation that reflects real-life movements to make your product stand out.
  4. It is imperative to consult with developers throughout the entire process of developing an app because their code affects its design.

Keep a long-term perspective

Maintain an easy and user-friendly interactive experience. Think about this: is it conceptualized and visually appealing, is the animation annoying on the hundredth use (or is it an alluring aspect of the app?). If an app does not appealingly demonstrate its world-class services, it won’t be favored by the general public. An app’s UX design can be greatly impacted by an animation if it is done properly. It can transform a static digital product into a dynamic experience that keeps your users returning. How well your app serves the customer determines its success. Hence, mobile app animation can help you improve it. To do the same, you can also contact us to use our mobile app development services.

AWS vs AZURE: Which Cloud Platform You Should Choose for Your App?

The cloud computing sector is expanding at a breakneck pace. As a result, the number of businesses utilizing the cloud for data storage, processing, and other services has increased tremendously. Amazon Web Services and Microsoft Azure have long dominated cloud computing.

Amazon Web Services and Microsoft Azure are the two leading cloud computing providers. They both have significant benefits like as higher computational power, scalability, security, cost-effectiveness, and carbon footprint reductions, making it tough to decide which is best. This article will look at what each platform has to offer and how they compare so you can make the best option for your requirements.

First, let’s understand what exactly is cloud computing.

Cloud computing is a technology that provides an internet-based platform for hosting resources such as web apps, databases, workloads, web services, and other types of applications. You may even make those hosting public, private, or both at the same time, which is known as a hybrid. Cloud services are provided by several computer companies, such as Microsoft’s Azure, Google’s own cloud, and many more. Using these technologies, cloud development services company work to make bespoke products or enterprise software.

Differences Between AWS and Azure:-

Below Is the Comparison Between AWS vs AZURE

Feature Comparison of AWS vs Azure

AWS vs Azure: Compute Engines

AWS delivers processing capacity in the form of Amazon Machine Images (AMIs), which may be customized with software components for any application and dynamically deployed based on demand via Elastic Compute Cloud (ECC) instances or Elastic Beanstalk applications. Meanwhile, Microsoft Azure’s compute products are built on VMs (Virtual Machines) and provide a variety of tools such as Cloud services and Resource management for cloud application deployment.

Amazon Web Services compute products are referred to as Amazon Elastic Compute Cloud (Amazon EC2), whilst Microsoft’s compute capabilities are referred to as Azure Virtual Machines.

AWS vs Azure: Content Delivery and Networking

AWS’s Virtual Private Cloud (VPC) allows users to construct isolated networks within the cloud. Within a VPC, they may construct route tables, private IP addresses, subnets, and network gateways. Microsoft Azure provides a Virtual Network (VNET) for customers to construct isolated networks. AWS and Azure also offer Content Delivery Network (CDN) for quicker content access via Amazon CloudFront and Azure CDN.

CloudFront increases security by tightly integrating with AWS security solutions such as AWS Shield, Amazon Web Application Firewall, and Route 53. Furthermore, Azure CDN enables greater security via customized third-party solutions such as Verizon’s Azure CDN or Akamai’s offering, for which Microsoft provides a complete feature comparison via its Product Documentation Platform.

Content Delivery and Networking

AWS vs Azure: Basic Features

In terms of customizable processing, storage, databases, and networking, AWS and Microsoft Azure provide generally equivalent cloud functionality. Even the virtual instances are essentially similar, with only the names changing.

AWS has a five-year head start on the others and is far more mature and feature-rich. It provides over 200 services, whereas Azure provides up to 100.

One of Microsoft Azure’s merits, though, is its worldwide reach and availability. Aside from that, there are other tools available to help you manage your Azure cloud architecture. Furthermore, if you utilize Azure, you may transfer data across your sites without leaving the Azure network, resulting in a shorter latency, cheaper costs, and improved security.

AWS vs Azure: Cloud Storage Options

AWS provides both cloud storage via Amazon Simple Storage Service (S3) and on-premises storage via Storage Gateway. The good news is that your storage rates may be tailored to how frequently and promptly you want data recovery.

Its primary storage may be utilized for a variety of purposes, including cloud-based applications, instance recovery, and cloud hosting. You may also use the LightSail server to take snapshots of your instances and instantaneously transfer them to a different location.

Azure also offers other storage options, such as Azure Blob storage and Azure file storage. It also offers site recovery, automatic server load balancing, import/export, and Azure Backup.

AWS vs Azure: Security

Due to its ease of supplying scalability, improved privacy safeguards, and thorough security to its clients, AWS has developed into the most mature and enterprise-ready service.

AWS excels at enhancing privacy by utilizing secure practices by default. When you create an AWS instance, networking access is by default restricted (EC2).

For improving the security posture, identifying vulnerabilities in cloud settings, and protecting multi-cloud and hybrid systems from emerging cyber threats, Azure provides a solution that uses artificial intelligence.

However, many Azure services come with less secure settings already installed. For instance, when you build a simple instance of a virtual machine, all ports are by default open.

AWS vs Azure: Pricing

Azure costs more per GB than AWS. AWS offers a pay-as-you-go payment option, which may be modified hourly with no penalty or notice. Azure requires all users to have scheduled contracts that are invoiced at monthly rates in advance in order to have access to resources.

AWS and Azure provide free beginning levels with limited use, allowing clients to test and purchase their services as needed. Their pricing method, however, is puzzling and difficult to handle, as are their infinitely changing incentives. As a consequence, seeking experienced advice is preferred.

For its pay-as-you-go approach, AWS costs per hour, whereas Azure charges per minute.

AWS and Azure both have a complicated price structure that grows with each new product or service. The number of adjustable choices has an impact on the final cost.

Conclusion:

The first consideration for every organization interested in cloud computing is which platform to use. AWS and Azure are ideal alternatives since they provide a wide range of services, from networking to storage solutions, to a wide range of enterprises. Consider how much flexibility and control you require from your IT infrastructure when you weigh your alternatives. Understanding what distinguishes each will enable you to make an informed decision about how to operate your organization effectively while maintaining the performance and security of data storage in this rapidly changing technology world.

Still, confused about which cloud will best serve your needs? We are here to help you with your problem. ultroNeous, a rising Tech Company, has created, installed, and managed innumerable cloud applications. Contact us, and take advantage of us.

How Flutter Can Lower Your App Development Cost

In a world that has become a digital realm, every brand is struggling to keep up with the pace of technological advancements and prospects’ expectations. Since the birth of the smartphone and its constant evolution, apps have become an ingrained part of people’s lives. According to Statista, by 2026, user spending on the App Store and Google Play would likely reach close to $233 billion. Yes, the consumption of apps is skyrocketing along with the growth and cut-throat competition. So now that we know the influence of apps, you might be intrigued to learn the nitty-gritty of app development for your company. 

But let’s figure out first what are the ways to develop apps, what factors affect the cost, and how Flutter can help you shine with your budget.

Table of Contents

Cross-Platform App Development

There are two prime approaches to mobile app development. 

Native App development: This method uses a dedicated programming language and tools of the mobile OS: iOS and Android.

Cross-platform app development: This technique utilizes a single codebase to develop mobile applications for multiple platforms at once.

Swift and Kotlin are the two programming languages that two teams of developers must employ when creating native apps for iOS and Android customers. One development team may create both apps using a cross-platform framework. Native development team composed of industry-experienced (and, thus, paid) professionals: Android and iOS developers, a designer, a tester, and a project manager.

In the same case, a cross-platform development team might only need a small-sized team: a designer, a project manager, a quality assurance engineer, and cross-platform app developers (Flutter, React Native, or Xamarin). The final cost of a project will be significantly reduced with lower team size. As we know, it is a stretch to maintain the quality of code along with the user interface. Bugs fixing and keeping up the updates are time-consuming in native app development compared to cross-platform app development. All in all, Cross-platform apps are the preferred option for businesses on a strict budget seeking a scalable and reliable mobile app.

What Factors Affect the Cost of App Development

Before jumping right into how Flutter will reduce the cost of app development, let’s take a look into the factors that affect costs associated with the development of mobile apps

Total Number of Features and the Complexity

Platform-specific app development can be complex due to its multifaceted nature. The requirements of the project need to be thoroughly examined. In addition to that, developers have to create administrative and management systems as well. Apps can be developed easily in some cases. The complexity of apps varies with the number of features. It is ideal to consult a leading mobile app development company to decide what functionalities can immensely benefit you and your end-users.

It is also the customization of the app’s features that affects its difficulty level and price, which reflects its complexity and development time. Streaming, augmented reality, and background processes can be easily created due to the lack of native functionality. As opposed to native solutions, Flutter takes less time to develop.

Third-party Integrations

Who wants to develop a customer-centric app with a highly interactive user journey? Everyone. The modern approach to application development presents many opportunities for developers and business owners. Due to the rising demand for seamless operation in apps, it is also becoming increasingly imperative to integrate it with third-party integrations. In layman’s terms, these tools help apps to become more responsive. With each new advancement incorporated into the application, the cost of application development goes up. 

Design

Application design plays a significant role. In order to make a successful app, a flawless interface and exceptional usability are equally valuable. Consumers are likely to return for more if the app is user-friendly and simple to navigate. 

A major component of UI design is integrating elements of UX (User Experience) with UI (User Interface). An application with a well-integrated UI and UX offers a more pleasant user experience. Consequently, the application’s features attract users’ interest.

App size, animations, graphics, and interactive elements are also factors that influence an application’s design cost. There is always a cost difference between a simple app and an app that has many pictures, animations, and display options.

App Maintenance

It’s important to measure how quickly your app is downloaded in iOS and Android stores in order to understand how your customers are enjoying the app. In the future, as you build custom features for the app, this insight is crucial. By using reusable components, Flutter 1.0 expands its capabilities. Flutter app development costs are reduced as developers have a lot more flexibility when creating new apps.

You can reuse code across your app with this easy framework’s widget library. As soon as you update your widget library code, it compiles instantly on the server. Changes can be made on the server side, and the changes are visible immediately on the phone. It is therefore necessary to update and maintain the app on a regular basis. There will be more than just regular updates required for the application. To improve its utility for customers, it will also undergo recurring design changes.

What Flutter Offers to Reduce the Cost of App Development

Now let’s explore a few benefits of Flutter that make it an affordable choice.

Streamlining Coding with Hot Reload

With Flutter, you can develop apps quickly and intuitively. Due to its simplicity, most developers enjoy developing apps using this framework. The Hot Reload feature allows developers to make quick changes in the code and the changes are immediately reflected in the app. Since even the smallest changes can be seen immediately, this promotes close collaboration between developers and designers. This reduces the cost of app development, allowing the app to be launched earlier and bringing in revenue.

Reusability of Code

Flutter makes app development easier for developers than native app frameworks. Due to Flutter’s highly expressive and flexible UI components, applications built with it are striking and dynamic. 

Flutter enables cross-platform app developers to reuse code, meaning that code written once for an app can be applied to other platforms as well. It is possible to reuse 90 percent of the code, which facilitates productivity, as well as lowers the cost of developing an application.

Widget Production

SDK widgets are included with Flutter. However, bespoke widgets can be made if needed. In creating and declaring the User Interface, widgets play a crucial role. In addition, mobile app developers could seamlessly customize apps. A transparent user interface provides a lasting user experience when apps are designed and developed with the framework.

Time-Saving on Testing

Comprehensive testing is required for an app to function smoothly. The testing process can take a long time if you are developing a multi-platform app. The single codebase is used by Flutter to create apps for all platforms, which speeds up testing. A quality analyst will save a massive amount of time because your app will only need to go through each of the quality measures once. Because it would take fewer hours to design and launch this app, the decreased testing period immediately lowers the cost of app development.

An Ideal Choice for MVP

If you’re a startup and looking for investors to see how your app works across various platforms, a Flutter app would be a smart option for you. The MVP (Minimum Viable Product) can be developed on nearly any platform without higher investment. As a result, both time and money are saved.

Open-Source 

Flutter is an open-source UI software development kit, which means it is available to everyone for free. The only expense that the entrepreneur needs to spend is on finding and hiring a Flutter app development company that can create a fully-functional, feature-rich, gorgeous app that is in line with their business objectives. This saves you a substantial amount of money, which you can put to better use.

Effortless Maintenance

Flutter-developed apps don’t require any additional maintenance expenses. Even previous operating cost versions of the program can be used without incurring additional fees thanks to the design. With it, you can build a robust app and take advantage of the platform’s native capabilities to get exceptional performance.

Security

To access device configurations, Flutter includes a plugin that wraps NSUserDefault on iOS and SharedPreferences on Android. Persistent storage is provided by this. Moreover, the framework communicates with the app just before going into background mode. You could use the data to create an additional timer to completely clear the cache. Additionally, the plugin grants access to the TouchID/FP sensor on iOS and Android.

Top Companies using Flutter

  • Stadia
  • Google Pay
  • eBay
  • Crowdsource
  • ByteDance

Closing Thoughts

Considering the aforementioned points, it is obvious that Flutter is the ideal option for designing affordable app solutions. It significantly influences how much it costs to develop an app. The fact that Flutter is an open-source framework for creating cross-platform apps, as well as the fact that it requires less code, less time to build, and allows for Hot-Reload, are some of the principal factors behind it. Flutter is a suitable option if you’re searching for an affordable yet successful app development solution, and contact us to develop the app of your dreams.

How Magento Development Can Elevate Your Brand Digitally

A boring, non-responsive eCommerce website will not attract loyal consumers. Consumers want to learn about what you have to offer from all of your affiliated companies, on any platform, and with a visually beautiful site to boot. They want to read other consumers’ reviews, go over product recommendations, and purchase suitable accessories. Fortunately, one eCommerce platform stands out above all others.

Magento is a well-known piece of software used in the creation of eCommerce websites. It is feature-rich open-source software that assists business owners in developing and managing their eCommerce shop. Magento has been redefining and reinventing the eCommerce market with its flexible capabilities since its inception in 2008 and when you have added the advantage of a leading eCommerce development company, you can enjoy this platform to the fullest. Magento is used by many brands to build up their eCommerce stores.

Magento development best for online store

Here are some of the reasons why Magento is a tested and true platform for launching an eCommerce store to elevate your brand digitally:

Reason for the Magento Ecommerce Platform

Flexibility

Magento may be made more adaptable by allowing developers to design modules that enhance the system’s capabilities. Magento refers to these modules as “extensions.” They provide developers with greater freedom than the standard Magento framework would normally provide. 

It maintains your brand’s growth by keeping up with the newest trends and creating new content. Without technical knowledge, you may simply alter web pages using Magento’s powerful content management system.

SEO-Friendly

SEO is essential for every online business, especially an eCommerce website. Your website would be invisible without SEO. Magento is SEO-friendly, since it, among other things, provides URL structure, sitemaps (HTML and XML), positioning layer, URL rewrites, metadata, tags, and descriptions. Magento’s powerful SEO tools make optimizing your eCommerce business simple and straightforward. 

Magento websites are very responsive and perform well on search engine results pages which is what every website needs in order to increase its brand value online.

Highly Customizable

Magento offers over a thousand templates and virtually infinite customization options for your website. However, coding a website from scratch is a difficult task and is best if left in the hands of expert Magento developers.

High Performance

High Performance is the most important part of Magento because it allows you to add more features to your store without slowing down the site.

Better User Experience

Magento provides a better user experience that will help customers feel more at ease when shopping on your website. Magento-powered websites are multi-responsive, supporting numerous stores and languages, and providing an easy-to-navigate and smooth-buying experience. All of these factors encourage the buyer to browse more and entice visitors to return to your website again and again.

Easy to Manage

Magento is a very versatile e-commerce platform with numerous capabilities that allow users to easily regulate and adjust their businesses to their own demands. You may control all aspects of the website using the admin panel. It includes, among other things, payment gateways, inventory management, shipping, and order tracking. And, because Magento is open source, you may always add and remove features according to your company’s needs.

Seamless Checkout Option

Customers who wish to buy things from numerous websites at the same time can use Magento’s seamless checkout options. This saves customers from having to visit each site individually to finish their orders.

Easy Third-parties Integration

Every eCommerce website requires a number of third-party integration solutions for payment gateways, numerous payment methods, analytics, database administration, shipping, tracking activities, and other features. Magento’s easy third-party integration is a major feature since it allows developers to easily include their own extensions into Magento. With simple third-party integration, developers can add functionality to their eCommerce sites much more easily.

Data Import & Catalogue Management

Magento has a built-in tool for importing data into the system. This can be used to import product data from third-party sources such as manufacturers, distributors, or resellers. After that, the imported data will appear in the catalog.


Security

When it comes to eCommerce, security is the top priority because it deals with consumers’ personal information, financial details, and other sensitive data. Your customers’ data is extremely precious, and Magento can assist you in safeguarding it. PCI compliance, SSL security, and other security components may be readily implemented using Magento.

They defend against hostile hacker attacks and assist prevent consumers from obtaining sensitive information such as payment information. As a result, your customers may safely browse and buy from your eCommerce website which will surely and certainly build your brand digitally.

Vast Community

A large developer community is crucial since it gives assistance and assists developers in resolving any challenges that arise while building their projects. Throughout the years, Magento has built a strong, outstanding, and supportive community. If you are experiencing technical issues or are unclear on how to fully utilize Magento for your business. Magento community members with years of expertise are always willing to help you.

Numerous Extensions

Magento also offers numerous plugins and integrations that improve the feel and functionality of your website. Third-party plugins such as payment gateways and web applications can easily integrate with Magento. 

From a safe shopping experience to convenient product management, Magento has endless features that lead to business growth and success. Magento makes eCommerce a better experience for you and your customers.

Conclusion:-

After reading extensively about how Magento development can elevate your brand digitally, you now need a Magento website development firm to guide you through and create a website for you. To assist customers in boosting brands’ brand value, website traffic, and online sales, we built a high-quality eCommerce website for you.

Why An Online Portal is A Must For Your Jewelry Business?

In this digital age, getting your business online has become a must for all store owners, whether small or large. Because having your business online allows you to reach a larger audience than just your immediate surroundings. The jewelry industry remains one of the fastest-growing, with a global market value of 269 billion dollars. Because jewelry is one of the most ancient industries that has survived for thousands of years, people still like wearing various types of jewelry and decorations. Time has passed, but the love of jewels has not, which means you will never run out of consumers. So, it’s a great idea for you to take your jewelry business online.

Table of Contents

Reasons Why You Need an Online Store for Your Jewelry Business

1. Increased Reach

Increased Reach with Online Jewelry Business

Running an internet business implies that practically everyone, not just locals, can find you. Your reach has the potential to be international, offering up a completely new market and clients who would not have been exposed to you otherwise. Selling online allows you to reach a much larger audience while also increasing your sales.

2. Your Shop is Open 24/7

Online Jewelry Business are open 24/7

Another advantage of running an online store is that customers may shop whenever they want. Your sales are no longer restricted to the hours of 10 a.m. to 5 p.m. You may sell from anywhere and at any time with an internet business. Clients no longer have to wait for you to open to make a purchase; they can shop at their leisure, which means that customers who would normally be unable to visit your physical location during your opening hours will be able to do so.

3. Convenient for Customers

It is convenient for customers to make a purchase in  online jewelry business

Customers will be happier with their shopping experience if they do not have to travel to your shop and wait in line to get their items. The simplicity of buying from the comfort of their own home, along with the speed of online purchases, improves your consumers’ shopping experience.

Starting your jewelry line and online business might be a difficult task. Fortunately, we’ve got a few steps to help you get started. 


Steps to get you started with Online Jewelry Business

Come up with a brand name that resonates with your Jewelry Business

Choosing and making a brand in Online Jewelry Business is must

The first step before beginning the website creation process is to select and secure a suitable domain name. The domain name is one type of address via which your customers may visit your jewelry business. Additionally, ensure that your domain name is related to your jewelry business, since utilizing inappropriate business domains will not help you obtain more clients through search engines.

Use correct platforms during site creation

Choosing the correct platform for your business from among thousands of available CMSs may make or destroy your business in various ways. You may choose any well-known CMS such as WooCommerce, Magento, Shopify, or other eCommerce platforms to meet your business needs. Find an appropriate hosting company that delivers adequate bandwidth based on your platform needs so that all of your customers enjoy a hassle-free shopping experience. Aside from that, you may host your material in the cloud or set up a CDN, which will help you cut load time and give an exceptional lightning-fast experience.

Provide Secure Payment Options

Secure ways to pay for purchase is must in Online Jewelry Business

You should also make it possible for customers to make payments without difficulty. Payment integration, like any other financial transaction, must be safe, secure, and simple to use. It’s a great idea to provide your customers with a variety of payment alternatives. It will assist you in expanding your customer base.

Provide Convenient Shipping Methods

Giving more options in terms of shipping for Jewelry buying is a must.

Shipping techniques are another important factor that might influence your jewelry store’s purchase experience. Several shipping companies provide various shipping methods such as normal delivery, economy delivery, expedited shipping, and so on. Some retailers charge for delivery methods, while others do not.

 Furthermore, not all of your consumers prefer such speedy or delayed delivery if they are purchasing jewelry for a special event. As a result, providing numerous shipping options helps your consumers to have a seamless and on-time delivery procedure. You may also ask your consumers if they are satisfied with the jewelry delivery and packing over time. This will assist you in understanding your customer’s needs and ensuring successful product delivery.

Use High-Quality images on your website

When shopping online, your customer cannot touch or feel the items or their quality. As a result, the only method for buyers to make a purchase decision is to view product pictures.

High-quality images allow your buyer to get a closer and more detailed look. As a result, you should make sure that the images you use during the website creation process are clicked on a white background and from numerous angles. If your product’s true color, size, and design are not clearly visible, it may affect your sales.

Don’t forget to market your website digitally

Just developing a jewelry website is not enough to attract customers to your website; you must also optimize your shop for better performance of user search queries. Today, over 97 percent of consumers use online media to seek products or services, and if your company isn’t relevant, you’re likely losing clients. You may also employ different banners and advertising (Digital Marketing) to attract more traffic and visitors to your online jewelry website in order to obtain a competitive edge.

Make Your Site Mobile-friendly

According to statistics, the usage of mobile devices to access the internet has expanded dramatically in recent years. Because about 95% of mobile visitors use their smartphones to look for items and shop, it is important to consider screen size during website building. Because having a mobile-friendly website saves you time, effort, and money over developing an app for various devices.

Conclusion

If you thinking of starting a website or an app for your jewelry store you must not miss out on the listed features for a good outcome. By adding the features advised in this blog post to your online portal, you can improve the quality of service you provide and make customers happy. To start a successful online jewelry business, talk to us, our UX designers and eCommerce developers will help you with your website’s requirements.

How to Make React JS SEO-Friendly

Tired of applying different strategies to get a higher search engine ranking for your React JS website? Are you still wondering why almost none of them are working efficiently? Well, no worries. You have arrived at the right place. In this article, we will not just showcase the whys and hows of making React JS SEO-friendly but will also take a deep dive into how the Google bots work, how important SEO is, what are the underlying challenges, and how you can resolve them.

Table of Contents

Significance of SEO

According to Statista, Google had an 83 percent share of the global search market as of July 2022, with Bing accounting for nearly nine percent. In comparison, Yahoo accounted for 2.55 percent of the market. In light of this, it is advantageous to develop your SEO strategy according to what Google considers best practices. We need to understand the process of Google ranking before we can learn how to enhance React JS SEO. 

Google uses a bot called Googlebot to crawl the site. These web crawlers go through all the content to index a site. Let’s make it simpler. Your site’s pages are crawled by these bots to discover new ones. A robots.txt file allows you to specify which pages should be crawled when creating a website. You can also hide some pages on your site to stop bots from overcrowding it. 

After crawling, Google bots index. Google bots analyze web content to determine what a page is about in this process. Outcomes of this process are kept in the Google index – a gigantic database of information about all web pages. All web pages are indexed automatically, so it’s crucial to logically arrange and display all content so a machine can understand it. Serving and ranking processes are part of the third step. Google uses its index to find relevant results when a user searches for something. So what is so challenging in React JS? Well, the answer lies in the language that is JavaScript, used in this popular frontend technology. 

Below is the block diagram from Google Documentation to help us understand how Google processes web apps and websites. Please note that it is a simplified explanation. Googlebot is considerably more advanced. 

SHowing How Google crawl, render and indexes a page
Source: Google Search Central

The following points should be noted:

  • Googlebot maintains a crawl queue that contains all the URLs it needs to crawl and index in the future.
  • Whenever the crawler is idle, it picks up the next URL in the queue, requests it, and retrieves its HTML.
  • Following parsing HTML, Googlebot determines that JavaScript must be collected and executed. When it does, the URL is added to a queue for rendering.
  • To render the page, the renderer gathers and executes JavaScript, ultimately returning the rendered HTML to its original location.
  • All URL tags on the web page are extracted and added back to the crawl queue by the processing unit.
  • Google indexes the content.

We hope now you have a clearer picture of how actually Google bot works. So let’s move on to identify the obstacles that arise while optimizing search engine ranking and overall performance with React JS web apps and websites. 

Read more: Top React Frameworks to Consider in 2022 and beyond

What Makes React JS SEO Challenging

In this brief overview of Googlebot, crawling, and indexing, we have only touched the surface of the subject. Nevertheless, software engineers need to be aware of problems search engines may encounter when trying to crawl and index React JS pages. Our next concern is how developers can address and overcome some of the challenges associated with React JS SEO. It is suitable to hire React JS developers who have acumen of developing intuitive digital products when tackling a heavily SEO-reliant project.

The Indexing Process is Complex and Slow

We are aware that React JS sites frequently experience issues with Google search and depend primarily on JavaScript. The WRS runs the JavaScript code once a bot has downloaded the HTML, CSS, and JavaScript files. Next, the WRS retrieves data from APIs, and only then does it deliver the content to Google’s servers.

The bot cannot find new connections and add them to the queue for crawling unless all of these conditions are met. This method is linear and moves much more slowly than indexing HTML pages.

Limited Crawling budget

The maximum number of pages that search engine bots can crawl in a given time frame is known as a crawling budget (typically five seconds for one script). As a result of Google having to wait too long (over five seconds) for scripts to load, process, and execute, many websites developed using JavaScript have indexing issues. If your site has slow scripts, the Google crawler will quickly exhaust its crawling budget and quit before indexing it.

Errors in JavaScript code

Processing errors are done differently in HTML and JavaScript. Indexing may not be possible due to a single mistake in the JavaScript code. This is due to how error-intolerant the JavaScript parser is. The parser immediately stops processing the present script and displays a SyntaxError if it encounters a character in an unexpected location. Due to this, a single error or typo could render the script completely useless. The Google bot will view the page as empty and index it as a page without content if this scenario arises while the page is being indexed by Google.

Issues of Indexing SPAs

 SPA (single-page apps) are web applications that have a single page that loads only once. All other data is dynamically loaded as required. SPAs are quick, responsive, and give consumers a linear experience, in contrast to conventional multi-page programs.

Nevertheless, SPAs have a serious SEO constraint in spite of all these advantages for end users. Such web applications can provide content even after the page has loaded. The bot will see an empty page if it is crawling the page before the content has loaded. The site won’t have much of it indexed. As a consequence, your website will rank substantially lower in search results.

Best Practices for React SEO

Following are a few of the best React JS SEO optimization techniques we can utilize to improve the search engine optimization of our React JS applications: 

  • Utilizing isomorphic React JS apps
  • Prerendering

Utilizing Isomorphic React JS Apps

Isomorphic means corresponding or similar in form and relations. This indicates, in terms of React JS, that the server and client both have a comparable form. In other words, the same React JS components can be used on both the server and client.

As JavaScript loads and runs in the background, the server may display the React JS app using this isomorphic approach and deliver the rendered version to users and search engines so they can view the content immediately.

This strategy has gained popularity thanks to frameworks like Next.js and Gatsby. We should be aware that isomorphic components can have a very distinct appearance from regular React JS components. They may, for instance, use code that executes on the server rather than the client. They might even contain API secrets (although server code is stripped out before being sent to the client).

You have control over whether the client may run scripts by using isomorphic React JS apps.

If JavaScript is disabled, the server or browser will render all the code. As a result, all of the content and meta tags contained in the HTML and CSS files will be accessible to the browser or bots.

Only the first page is rendered to the server if JavaScript is enabled. The browser thus makes use of the HTML, CSS, and JavaScript files. JavaScript then begins to operate, enabling the rest of the material to be loaded dynamically. The user interactions are smoother as a result of the first-page loading quicker than in any generic JavaScript framework.

Server-side Rendering Technique: NextJS Features vs Gatsby Features

Next JSGatsby
Allows for full server-side rendering and Includes a lot of ready-to-use parts.Enables the transmission of data from any location.
Supports the creation of static pages at build time.The tool that is already performance-driven.
Facilitates Hot Module Replacement: Real-time monitoring of all modifications.Broad open-source system.
Capable of loading only JavaScript and CSS.Proper record keeping.

Prerendering

One popular method for making single- and multi-page web apps SEO-friendly is pre-rendering.

When search engines can’t properly render your pages, pre-rendering is used. Pre-renderers are specialized programs that intercept requests to your website and, if the request is from a bot, send a cached static HTML version of your website in these circumstances. The typical page loads if the request came from a user.

The following benefits come with using this method to optimize your website for search engines:

  • All kinds of modern JavaScript can be run by pre-rendering programs and converted into static HTML.
  • All the newest web innovations are supported by pre-renderers.
  • This strategy involves either very little or no changes to the codebase.
  • It’s effortless to put into practice.

Although, there are some disadvantages to this strategy as well:

  • Regarding pages that show frequently changing data, it is not appropriate.
  • If the website is big and has plenty of pages, pre-rendering may take too long.
  • Services for pre-rendering are not free.
  • Every time you alter the content of your pre-rendered page, you must rebuild it.

Conclusion

The difficulty of successfully fusing SEO and React JS has diminished over the past few years. Single-page applications, the kind of websites most frequently created using React JS, are still difficult to guarantee to be SEO-friendly. You may choose pre-rendering or server-side rendering to make an Application visible to Google bots and accessible for indexing. Both strategies need more time, money, and effort to ensure SEO friendliness, but if you intend for your website to appear highly in Google search results, you should absolutely use them. If you still want to explore all the aspects of React JS development, then contact us and get the best of the best experts to resolve all your queries.

Android 13 is Officially Here, Features, How to Install

Google officially launched an update in the operating system on 15th August 2022: Android 13. Google has released many preview builds of Android 13 so that Android app developers can test their apps. Those who own the Google Pixel 4 (including those with subsequent models) should already have the update ready to install. For those who don’t have Pixel phones, the new software will be rolled out to other phones throughout the remainder of 2022. Before Android 10, Google named its operating systems after sweet delights. The version is still referred to inside as desserts, even though it has been changed to a number in the public sphere. The name for Android 13 is “Tiramisu” as revealed by the first developer preview. 

So now, let’s take a closer look at the features and what’s new Android 13 has stored for us.

Features

We are presenting this blog post with sections covering the three primary user-facing bases, including UI updates, cosmetic tweaks, and specific usability functions to assist you in navigating the features added in Android 13.

Wallpaper and Theme Customization

Wallpaper and theme customization in Android 13

Android 13 delivers an improved appearance and feel based on Material You. Non-Google apps can be customized to match your phone’s wallpaper theme and colors, creating your home screen quite unified and distinctive to your style. On Pixel running Android 13, 16 new color extraction options are available in the wallpaper picker along with themes.

Notification Panel

Separate permission access to "Photos & Videos" or "Music & Audio" in Android 13

When you initially run an app after upgrading to Android 13, you may notice a subtly redesigned permissions screen with more curved edges. Further, instead of granting access to “Files and media,” you permit access to “Photos & videos” or “Music & audio,” depending on the files an app requires.

This also offers brighter and more visible buttons within the floating pop-up. The “Allow” and “Do not allow” buttons will maintain the Dynamic Color settings and system theming.

Effortless Copy and Paste

Effortless copy and paste in Android 13

You may alter the contents of a copied item by tapping the floating panel at the bottom of the screen when you copy something on Android 13. Occasionally, relevant options will appear. The URL you copy, for example, can be opened in your browser when you copy it. If you are signed into the same Gmail account on both Android devices, you can copy anything on one and paste it on the other, eliminating the need to email yourself from phone to tablet. The clipboard history will be erased automatically (perhaps after an hour) to protect your privacy.

Media player lines

Music Wavy lines in notification panel and lock screen in Android 13

During playback of media in music, podcast, and certain video streaming apps, a wavy line will appear to the left of the playback head. As part of the media player redesign, this will display how much media has been played.

To the right of the playback head, a thin solid line indicates anything that has not yet been played. You can see how much of a song, podcast, or film you have completed at a glance. The lock screen and Quick Settings media player display this modification.

Control of language per application

Control language of individual app in Android 13

Multilingual users will be pleased to know that you can now set several default languages for each app. To set languages for specific apps, navigate to Settings > System > Languages and enter and press on App languages.

QR scanner

Because the pandemic has made scanning QR codes a daily experience for many of us, having rapid access to a QR code scanner is useful. A QR code scanner powered by Google Lens is also now accessible. This allows you to run Lens and read QR codes from any screen in Android 13. Scanning is quick and allows you to open online sites, and do a variety of other things. In Android 13, pull down the notification shade and touch Edit (the pencil icon) to customize your Quick Settings tiles. You may add the QR Code Scanner to your panel by dragging it there.

Battery Measures

Specifically, Android 13 will warn you when apps drain your battery excessively in the background. Alerts appear as silent notifications, and you can kill the app with a simple tap. Swipe away the notification instead if you want the app to keep running. Afterward, the notification shade shows an overview of apps running in the background, which stays out of the way but informs those who want to know more.

Enhanced Privacy

Location-tracking permission used to be required to enable an app to scan for nearby Wi-Fi devices. Since there’s now a separate Nearby Wi-Fi Devices permission option, that no longer applies. Privacy dashboard (found under Settings > Privacy > Privacy dashboard), which displays all apps that access the device’s camera, microphone, location, and other settings permissions over the past 24 hours, now shows the past week’s history as well.

Bedtime mode and dark theme

In Android 13, you can dim the wallpaper and use a dark theme for Bedtime mode. When you’re about to go to bed, these screen options help you adjust to the darkness. In the middle of the night, if you wake up and check your phone, they can also help you get back to sleep.

Spatial Audio

You will feel immersed in the action with Spatial Audio’s immersive 3D sound. It is for video games and movies. Only headphones that support head tracking are compatible with this feature.

Support for Bluetooth LE audio

The Android 13 operating system supports Bluetooth LE (low energy) audio as well as Low Complexity Communications Codec (LC3). Wireless headphones, earbuds, and other devices that support it will consume less power and have better audio quality.

A better tablet experience

There are quite a few changes in Android 13 that make using large screens a bit more convenient. A taskbar appears at the bottom of your Android tablet or folding phone, with frequently used apps (you can hide them), quick settings and notifications, and drag-and-drop multitasking with recent apps pinned. Wear OS smartwatches will unlock tablets automatically, and audio-switching will allow you to listen to your wireless earbuds while watching a movie on your tablet. In addition to YouTube Music and Google Maps (android 13 is not required), Google has been rolling out updates to more than 20 Google apps with redesigned interfaces for larger screens. 

Also, Android 13 allows tablets to recognize finger and stylus touches separately, thereby improving palm rejection when sketching or writing notes. It will be interesting to see what happens.

How to install Android 13

You may now download Android 13 if you’ve got a Google Pixel phone (Pixel 4 and Pixel 4A or later versions). Simply navigate to Settings > System > System update and select Check for update.

Other Android smartphones, including those from Samsung, Asus, HMD (Nokia phones), iQOO, Motorola, OnePlus, Oppo, Realme, Sharp, Sony, Tecno, Vivo, and Xiaomi, should receive the update later this year. If you don’t want to wait, some of these devices are eligible for the Android 13 beta program.  If your device is supported, you can join the beta program.

After signing up, you’ll be able to access the most recent beta release as an over-the-air (OTA) update but be warned: beta releases may be unreliable and glitchy. We strongly advise you to back up your Android phone before registering, as there is a genuine risk of losing your data.

In essence

These features are among the many you’ll find in Android 13, which also includes HDR video support from third-party camera apps, an updated media output switcher, and braille displays for Talkback. As well as providing a connected experience on your phone, you can also use it on tablets and laptops. We hope this gives a proper insight into what Android 13 offers and how its numerous features can greatly benefit its user base. For cross-platforms like React Native and Flutter, developers need to make adjustments to their app in terms to migrate the app to Android 13 soon and fix the minor bugs that may come with the new Android version.

Let’s Discuss your Idea.